Tutorial: Recording a Track
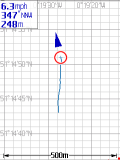
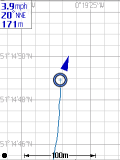
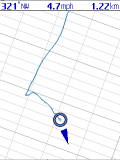
Its probably about time to go out for a walk to best see TMJ-Mobile in action! As you walk along, a track of where you have been is recorded and displayed as a blue line on the Plan page (key [4]). Press the [fire] key to turn on 'AutoPan' (shown by a black dot in the lower left corner). This locks the Plan to keep your current location in view. Use the [*] and [#] keys to zoom in and out. With AutoPan off the [up],[down],[left] and [right] cursor keys pan around the view. Press [4] to jump back to your current location, then [4] again to zoom out to view the entire track.
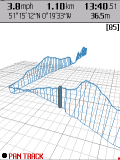
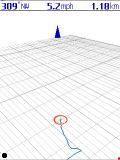
Try the Navigation page (key [5]). This shows a rotated perspective view, locked to your current position. Pressing [fire] locks the view rotation to your current direction of travel. Press [fire] again to unlock the view, the [left] and [right] keys can then be used to rotate, and the [up] and [down] keys to tilt the view.
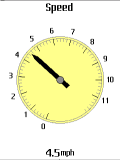
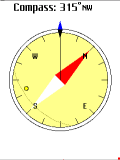
On to the Gauges page (key [7]). Each gauge should be fairly self-explantory. Press [left]/[right] to switch between the full-screen gauges and [up]/[down] for the quarter-screen gauges.
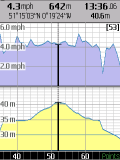
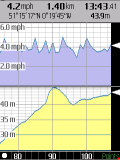
The Graphs page (key [9]) shows your speed and altitude profile at you move along. Press [fire] to lock the graph to your current location, or [fire] again to unlock the graph allowing the [left]/[right] keys to manually scroll. The [*]/[#] keys zoom in and out, whilst the Context Menu [Select2] gives further options for selecting the x-axis (Points, Distance, Time, etc).
Finally try the Visualisation page (key [8]). This can be used to intricately examine the track point-by-point. As with many of the other screens the [fire] key locks/unlocks the view to the track. When locked the view will always be centred on some point along the track, when unlocked the view is able to be freely panned around. On this screen the [8] key is also used to switch between Walk, Pan and Rotate modes, which control how the cursors keys function.